Configure FTD for Duo LDAP in Security Cloud Control
Procedure
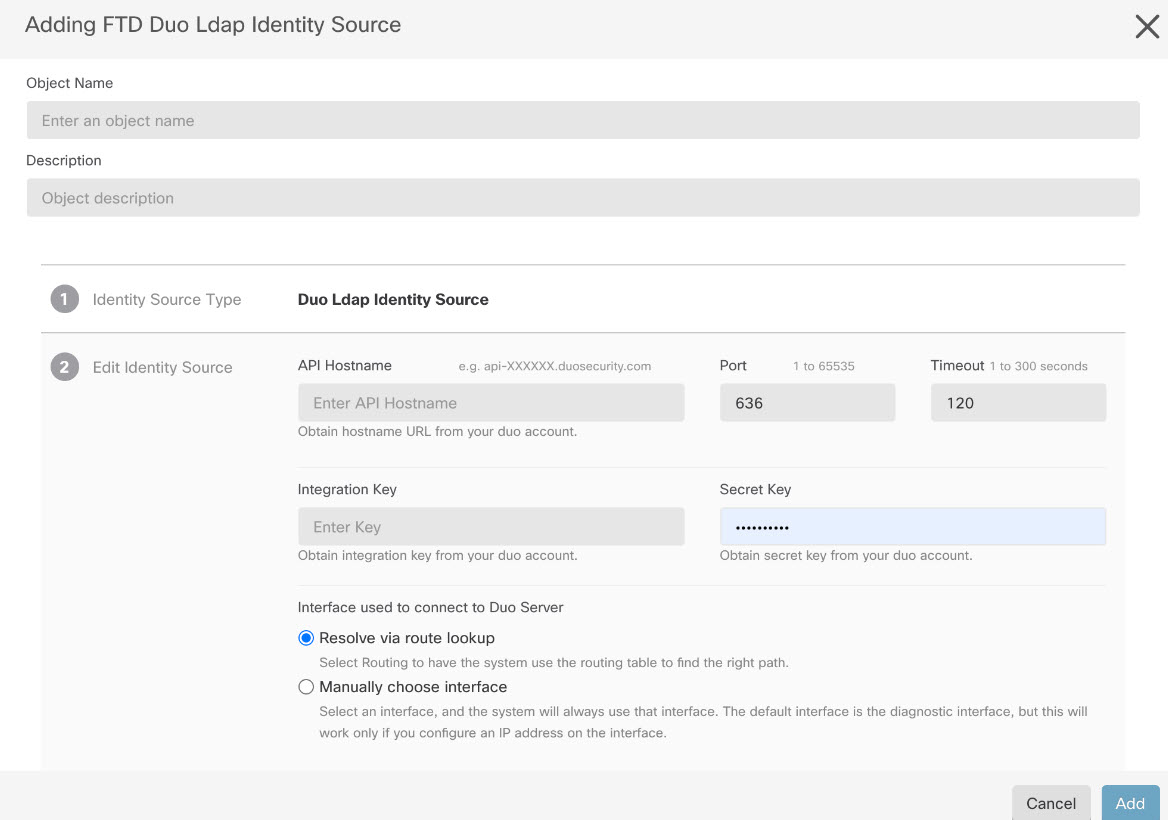
Step 1 | Create a Duo LDAP identity source object for the Duo LDAP server.
| ||
Step 2 | (optional) Use the AnyConnect Profile Editor to create a profile that specifies 60 seconds or more for authentication timeout. You need to give users extra time to obtain the Duo passcode and complete the secondary authentication. We recommend at least 60 seconds. The following procedure explains how to configure the authentication timeout only and then upload the profile to FDM-managed device. If you want to change other settings, you can do so now.
| ||
Step 3 | Create a group policy and select the AnyConnect profile in the policy. The group policy that you assign to a user controls many aspects of the connection. The following procedure explains how to assign the profile XML file to the group. For more information, see Create New FTD RA VPN Group Policies. | ||
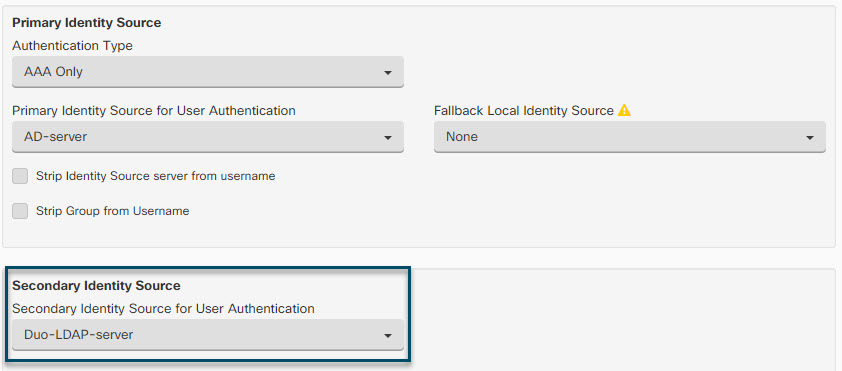
Step 4 | Create or edit the remote access VPN connection profile to use for Duo-LDAP secondary authentication. The following procedure just mentions the key changes to enable Duo-LDAP as the secondary authentication source and apply the AnyConnect client profile. For new connection profiles, you must configure the rest of the required fields. For this procedure, we assume you are editing an existing connection profile, and you simply must change these two settings.
| ||
Step 5 |
 to create an object >