Upgrade ASA Secure Client Packages
Follow the steps below to select compatible versions, manage platform-specific packages, and monitor your deployment status.
Before you begin
Before initiating an upgrade, ensure your devices meet the following criteria:
-
Devices must be online and synced with Security Cloud Control Firewall Management for connectivity.
-
Devices must be configured as ASA RA VPN headends.
Procedure
Step 1 | From the Security Cloud Control Firewall Management Home page, click Firewall. | ||
Step 2 | Choose Operations > Upgrades. | ||
Step 3 | Click Begin an Upgrade and select ASA Secure Client Upgrade from the drop-down list.  | ||
Step 4 | Enter a name for your upgrade in the Job / Update name name field. | ||
Step 5 | Select the ASA devices you want to upgrade and click Next. 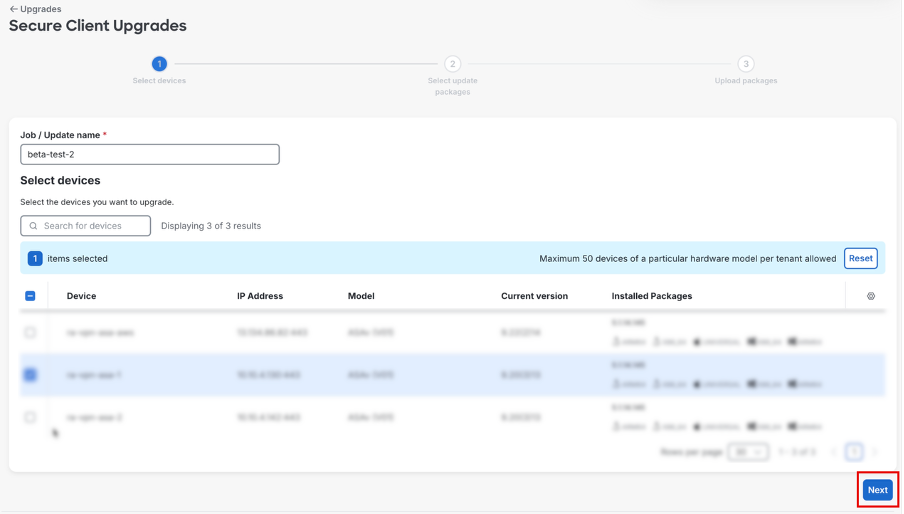
| ||
Step 6 | Select the Secure Client version you want to install. Note: The available versions are based on compatibility with the selected ASA devices. Not all devices are compatible with every Secure Client version. | ||
Step 7 | Review the available platform packages for the selected version. 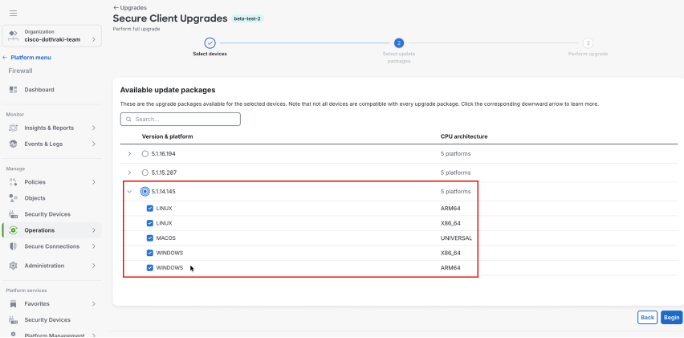 Note: By default, all available platforms are selected. To upgrade only specific packages, select the required platforms, such as Windows, macOS, or Linux. | ||
Step 8 | Click Begin to start the upgrade. 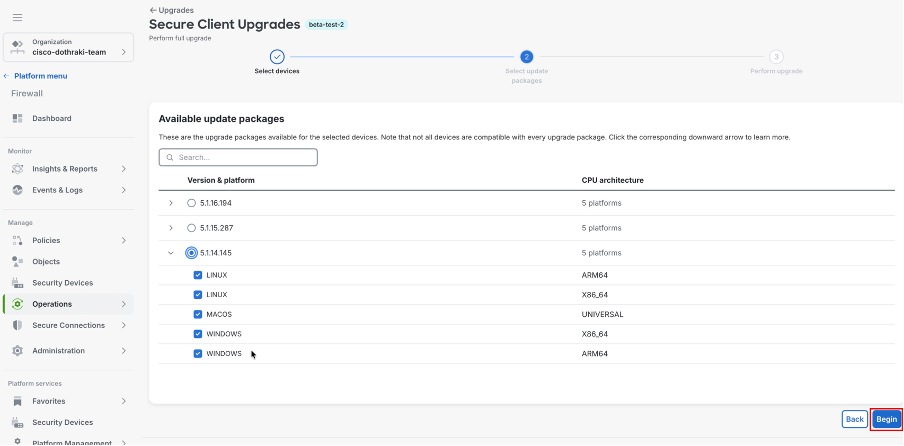 | ||
Step 9 | Click Back to Upgrades to navigate to the Upgrades page and monitor your progress. 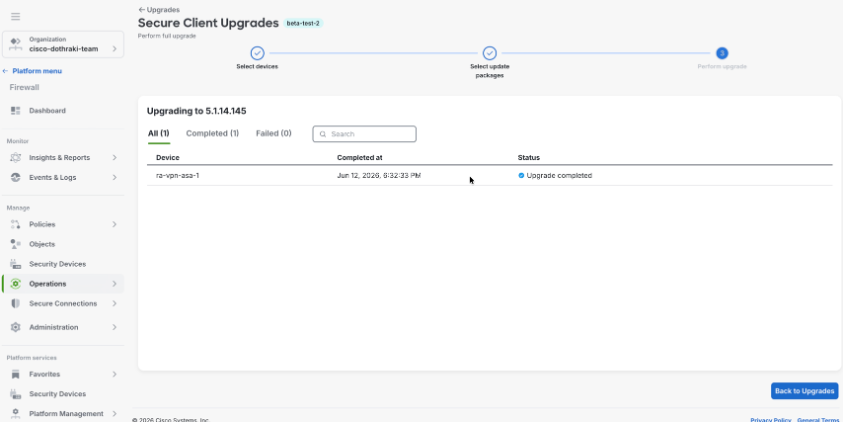
|
Your selected ASA devices now run the upgraded Secure Client packages. Real-time progress and errors appear in the Status column.